Static Client Lists are a valuable tool if you're looking for ways to customize your Email Blasts beyond those clients who are in your booking platform. You can use this feature to upload custom lists of clients and then target only those clients in your blasts.
Create a Static Client List:
- Navigate to the Client List tab in your Portal and choose Static Cient Lists
- Click + Create Recipient List to start building a new list
- Enter a name for your new recipient list and choose a color (optional) to associate with the list.
- Select your method for adding clients to your custom list. You can search for current clients in Loyalsnap, Create New Clients, or Upload a CSV
List Upload Methods
Search for Clients
-
Select the Search method for adding a client who already exists in Loyalsnap to your list
-
Search for the client you want to add by their name or email address
-
Click Add Clients
Create New Client
For this method, a new contact will be created in your Loyalsnap Portal. You can only use this option if the client does not already exist in Loyalsnap.
-
Select the Create New Client method to add a new contact to your list in addition to adding them to your Loyalsnap Portal.
-
First name, last name, email address are required fields. Phone number and Location are optional and are not required to be filled out
-
Click "Add"
✉️ Note: If the email of your new contact exists in Loyalsnap, you will receive an error. New contacts can only be manually texted or emailed and will not receive automations or appear on the Dashboard. Once this client has been added into your booking platform with this email address, they will update in Loyalsnap.
Upload CSV
-
Select the Add CSV file method for adding a client to your list
-
Drag or upload a .csv file into the pop-up.
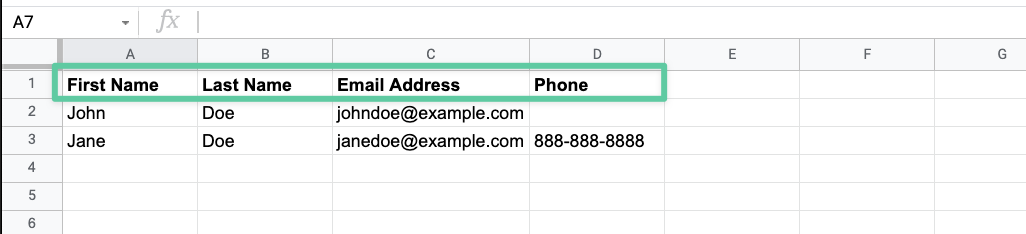
❗ Your .csv file must include a header row that includes "First Name," "Last Name," "Email Address," and "Phone". First name, Last name and Email address are required fields. You are not required to put a phone number for each client.
3. Click Add Clients
🗒️ To save an Excel file as a .csv file, please follow these steps:
In your Excel spreadsheet, click File.
Click Save As.
Click Browse to choose where you want to save your file.
Select CSV from the Save as type drop-down menu.
Click Save.
🗒️ To save a Google Sheet file as a .csv file, please follow these steps:
In your Google Sheet, click File
Hover over Download
Click Comma Separated Values (.csv)
Color Coded Lists
Once you have created your list, you can choose or change the color associated with the list. This will help you stay organized and easily find what you're looking for at a glance!
Pro Tip: If your .csv file has empty rows, emojis, or special characters, the upload can result in an error. Please make sure your .csv file has the exact header rows mentioned above and does not include any empty rows, emojis, or special characters.